How To Log In and Transfer Files with Globus
This step-by-step guide will show you how to log into Globus and use it to transfer files reliably and securely. You will become familiar with basic Globus concepts and interfaces, and begin to experience how Globus can help you transfer your files more efficently.
We have a video tutorial here.
1. Login with an existing identity
Not a UW-Madison client?
UWBC will need to know your PRIMARY Globus Identity (usually formatted like an email address) before we can share the data with you.
Sometimes your identity might look like this: user@comapny.com@accounts.google.com
Globus Identity (usually formatted like an email address) before we can share the data with you.
Sometimes your identity might look like this: user@comapny.com@accounts.google.com
See Tip: Identity below.
Visit www.globus.org and click "Login" at the top of the page. On the Globus login page, choose an organization you’re already registered with, such as your school or your employer. (Try typing a few letters of your organization’s name to narrow the list.) When you find it, click "Continue."

Tip: Identity
If you can’t find your organization in the list, you can use Google, ORCID, or Create a Globus ID, any of these can be a your Globus Identity. For external clients who do not have a UW NetID, UWBC will need to know your Globus Identity before we can share the data with you.
CLICK HERE TO FIND & MANAGE YOUR GLOBUS IDENTITIES.
You’ll be redirected to your organization’s login page. Use your credentials for that organization to login.
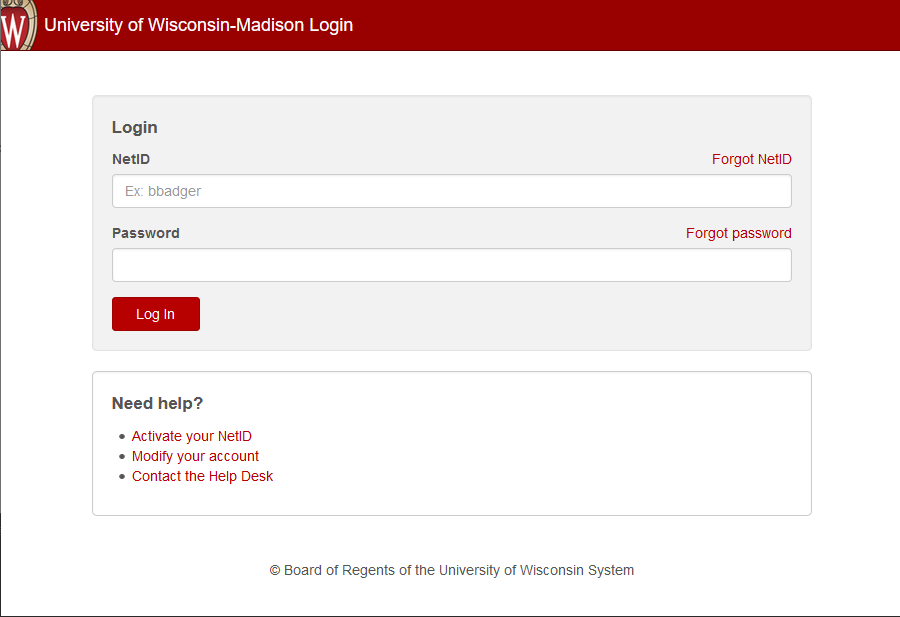
Some organizations will ask for your permission to release your account information to Globus.
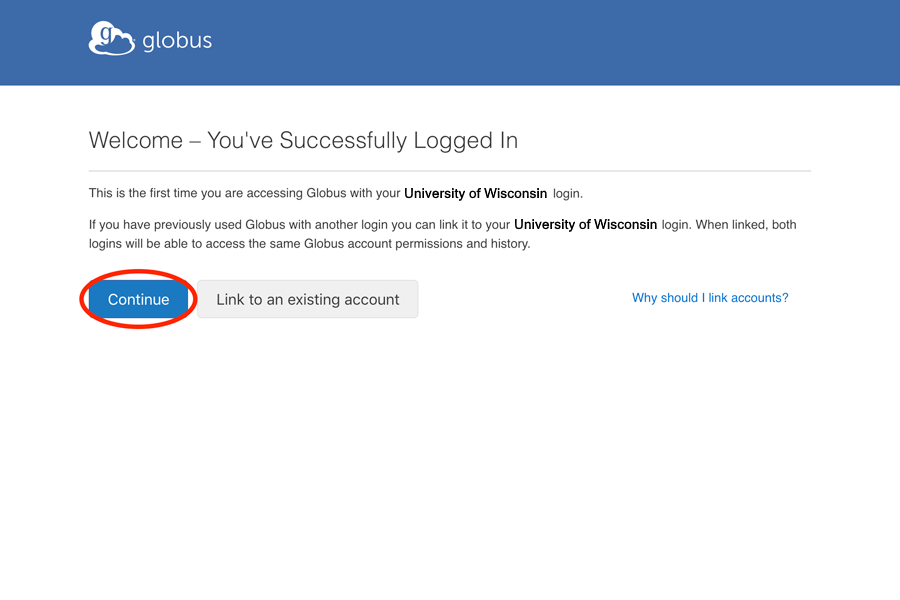
Once you’ve logged in with your organization, Globus will ask if you’d like to link to an existing account. If this is your first time logging in to Globus, click "Continue." If you’ve already used another account with Globus, you can choose "Link to an existing account."
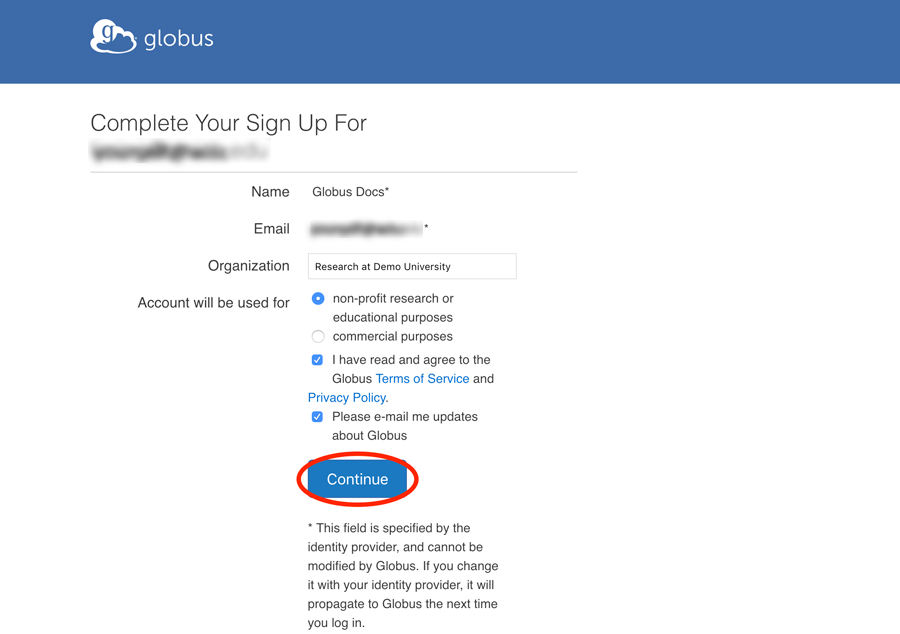
You may be prompted to provide additional information such as your organization and whether or not Globus will be used for commercial purposes. Complete the form and click "Continue."
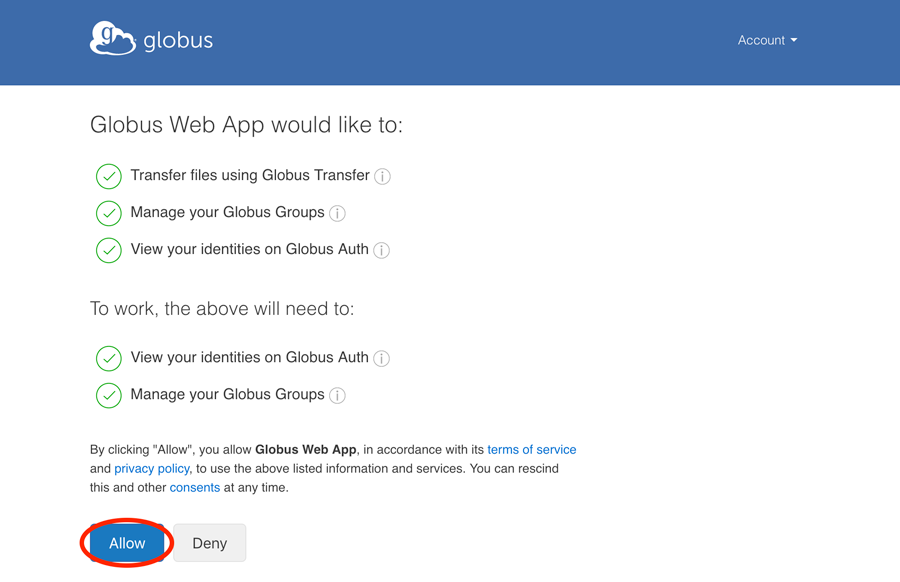
Finally, you need to give Globus permission to use your identity to access information and perform actions (like file transfers) on your behalf.
2. The File Manager
After you’ve signed up and logged in to Globus, you’ll begin at the File Manager.
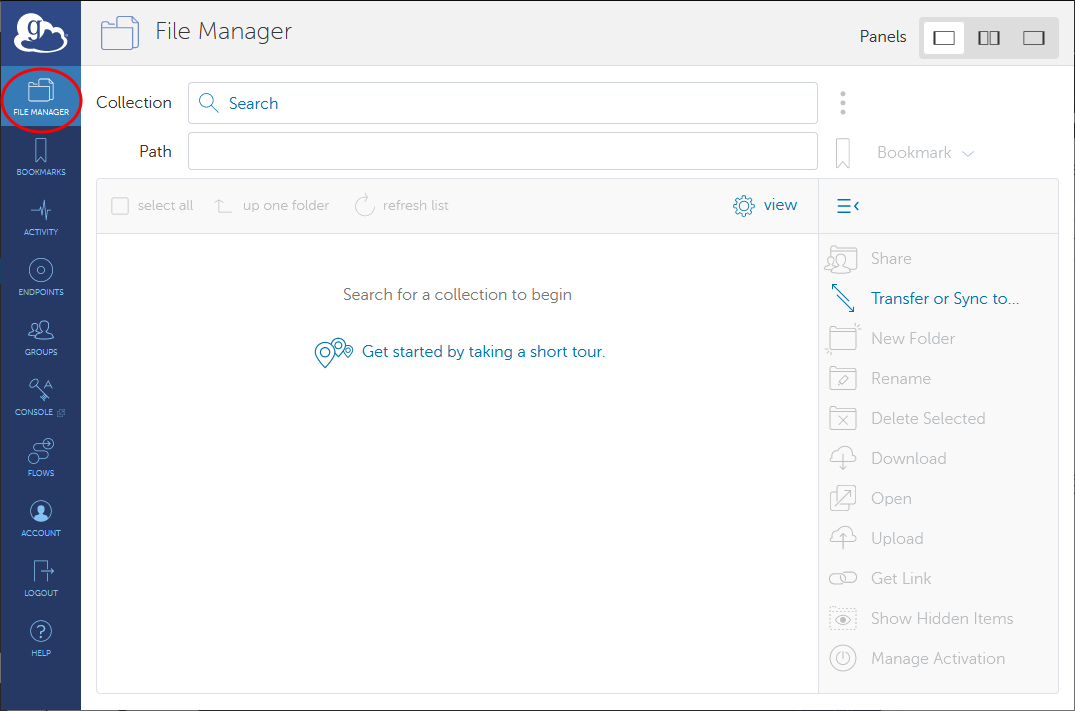
The first time you use the File Manager, all fields will be blank.
Tip: Collections
A collection is a named location containing data you can access with Globus. When you use Globus, you don’t need to know a physical location or details about storage. You only need a collection name. A collection allows authorized Globus users to browse and transfer files. Collections can also be used for sharing data with others and for enabling discovery by other Globus users. Globus Connect is used to host collections.
Data are transfered between endpoints not downloaded to a your local machine. You can transfer data to any endpoint that you have permission to access. There are instructions below for setting up a Globus Connect Personal create an endpoint and collection on your personal machine so that you can "download" your data locally.
3. Access a collection
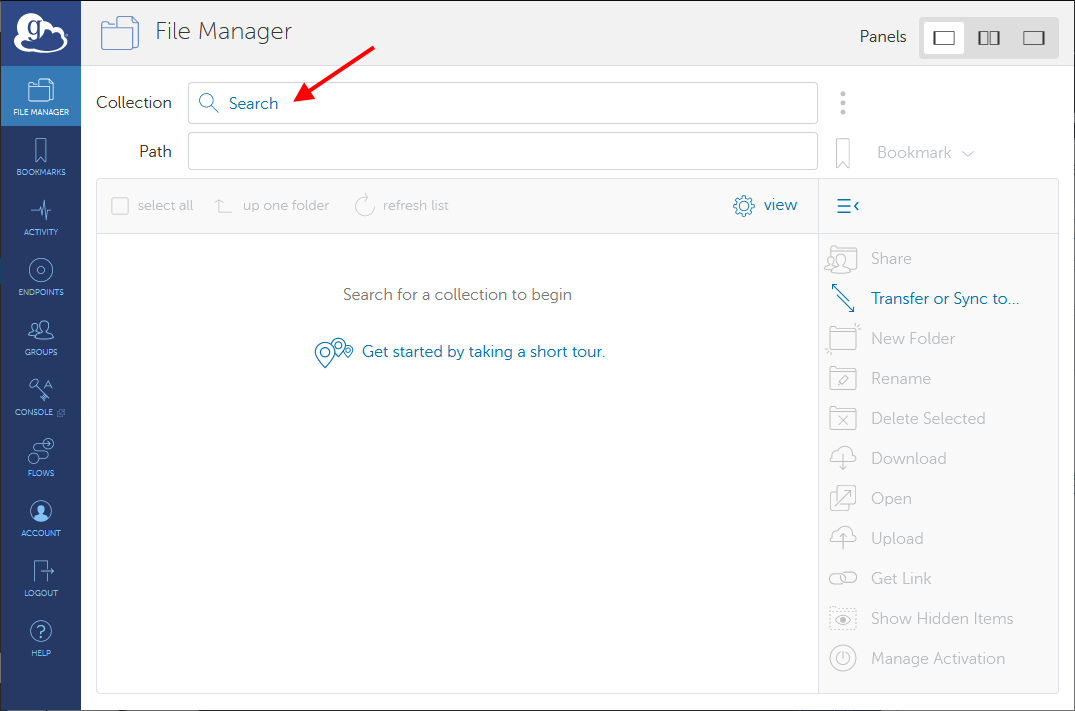
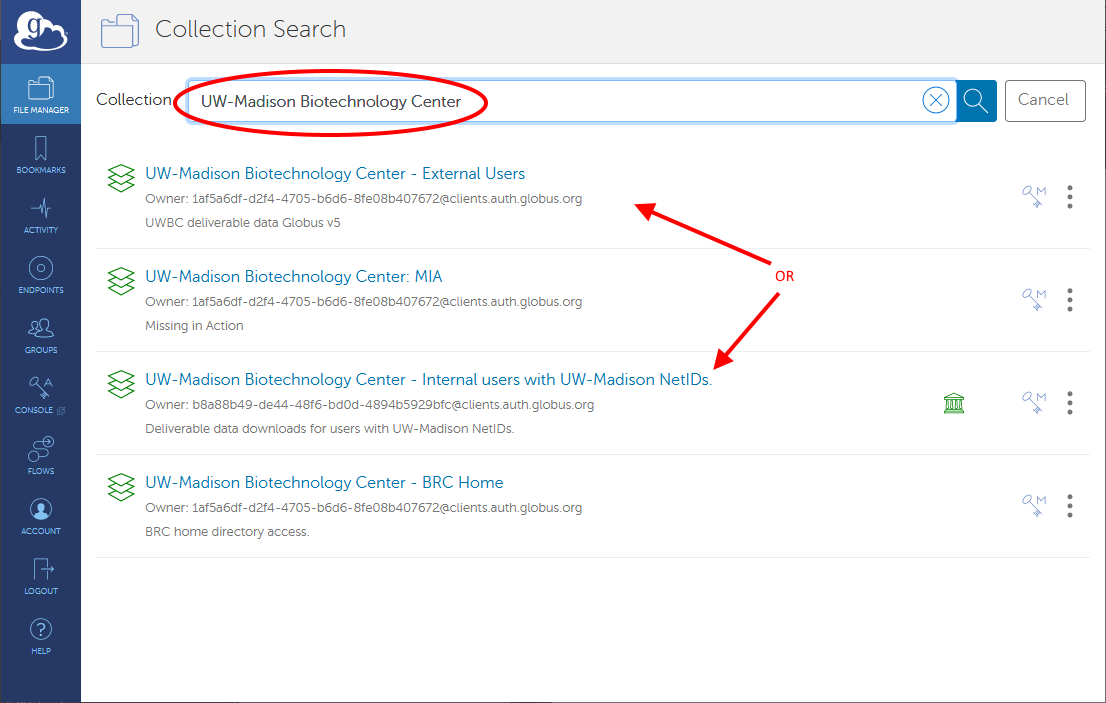
Click in the Collection field at the top of the File Manager page and type the name of the endpoint. Globus will list collections with matching names. The collections hosted by UWBC start with "UW-Madison Biotechnology Center..."
The collections Globus Tutorial Endpoint 1 and Globus Tutorial Endpoint 2 are collections administered by the Globus team for demonstration purposes and are accessible to all Globus users without further authentication.
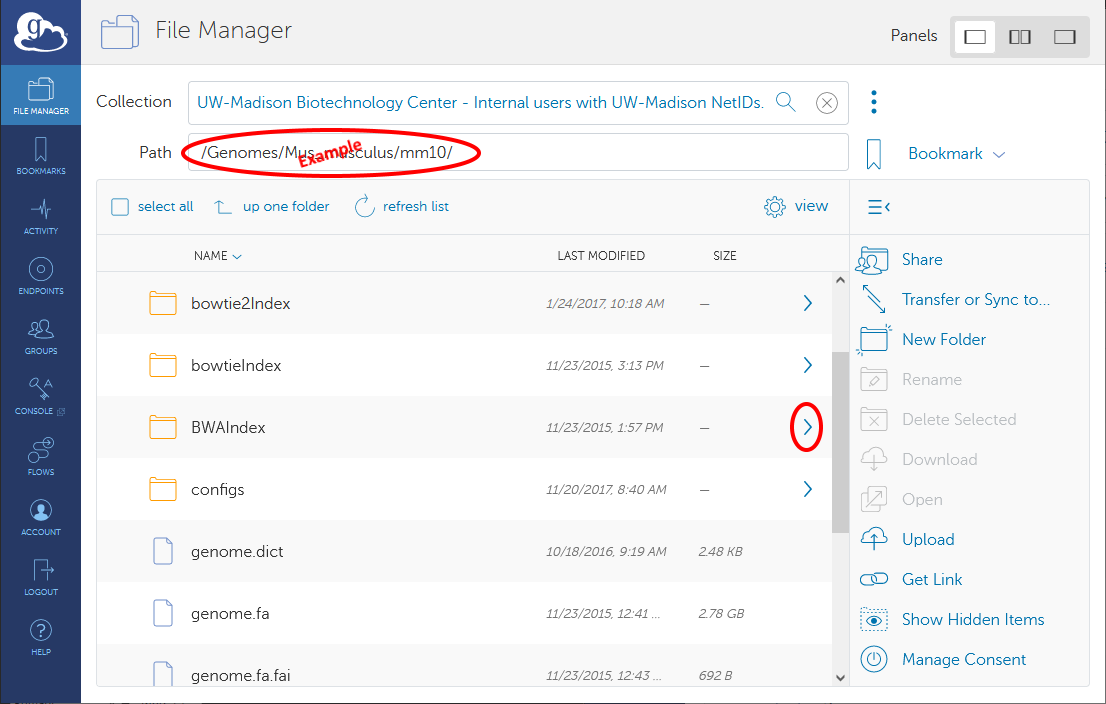
Click on the Globus Endpoint that has data you wish to transfer. Globus will connect to the
collection and display the default directory, /~/.
Click the "Path" field and change it to the directory containing the data to be transfered. You can also navigate using the arrow
in the
If using the Globus tutorial data this drirectory will be: /share/godata/. Globus will show
the files in the new path: three small text files.
Tip: Correcting Permission Errors
If you you see permission errors when you try to access the collection, then UWBC may not have your correct identity on file. Please confirm the Globus idenity that you are using on the account page.
4. Request a file transfer
IMPORTANT NOTE: The "Download" link on the page only works for single files! (see FAQ)
Watch the video: Transfer timestamp
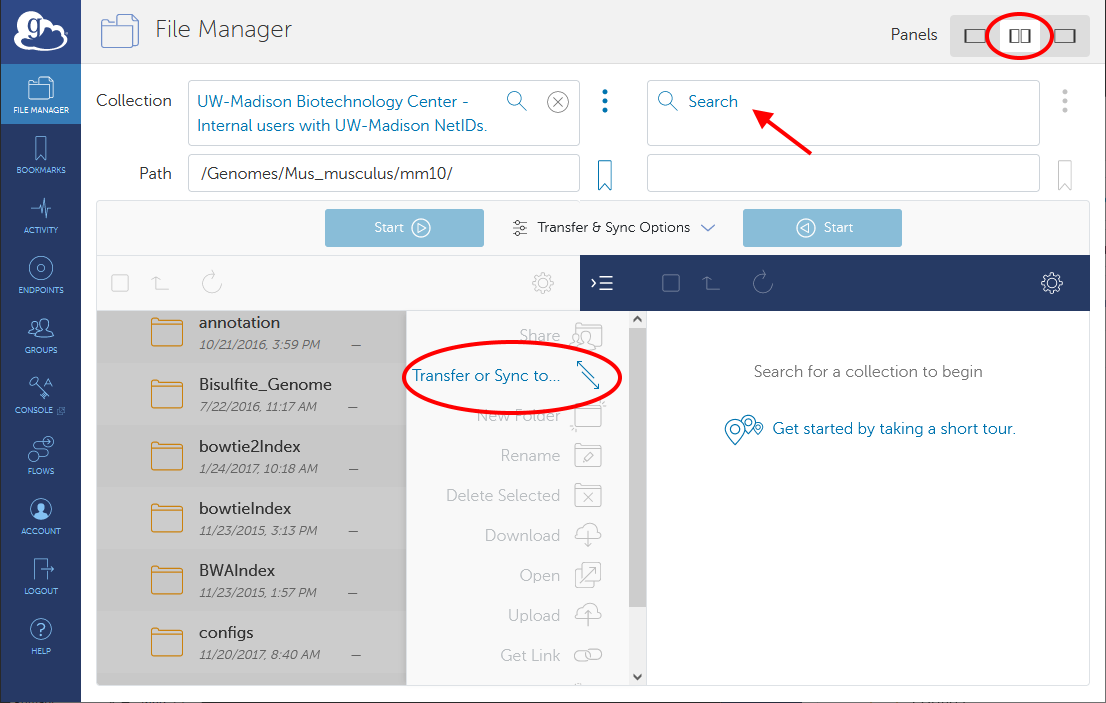
Click "Transfer or Sync to..." in the command panel on the right side of the page, or change the "Panels" view at the top right of the File Manager page. This will show both panels for both endpoints. Select the "Transfer or Sync to" field to select the endpoint that will receive the data.
Find the second endpoint collection and connect to it as you did with the first endpoint above. Instructions for creating a personal endpoint on your local machine can be found below. The default directory will again be /~/. Navigate to the receiving location on the second endpoint.
Between the two Start buttons at the bottom of the page, the Transfer & Sync Options tab provides access to several options. By default, Globus verifies file integrity after transfer using checksums. Click the information icons for explanations of the other transfer settings. Globus gives you powerful control over the behavior of the transfer with a simple mouse click. Change the transfer settings if you’d like. You may also enter a label for the transfer, but this isn’t required.
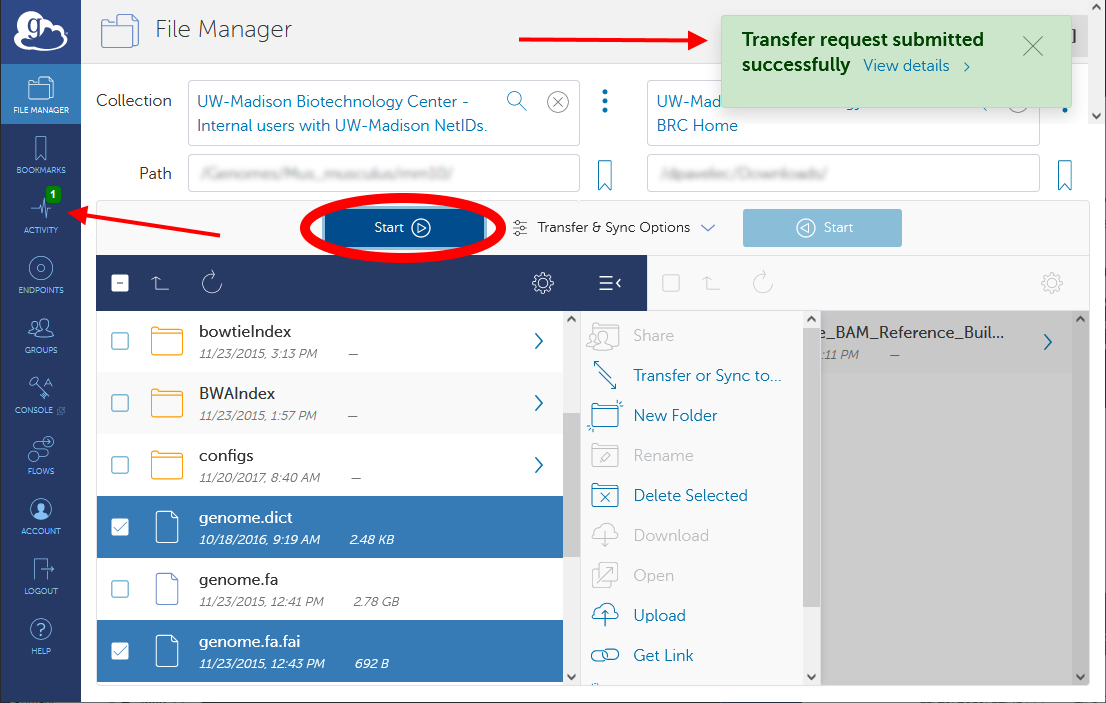
Click the Start> button to transfer the selected files to the collection in the right panel. Globus will display a green notification panel, confirming that the transfer request was submitted, and add a badge to the Activity item in the command menu on the left of the page.
Tip: Fire-and-forget data transfer
After you request a file transfer, Globus takes over and does the work on your behalf. You can navigate away from the File Manager, close the browser window, and even logout. Globus will optimize the transfer for performance, monitor the transfer for completion and correctness, and recover from network errors and collection downtime.
The Globus service routinely achieves high availability, providing nearly uninterrupted oversight of data transfers taking place on much less reliable networks and collection hosts. When a problem is encountered part-way through the transfer, Globus resumes from the point of failure and does not retransmit all of the data specified in the original request.
Globus can handle extremely large data transfers, even those that don’t complete within the authentication expiration period of a collection (which is controlled by the collection administrator). If your credentials expire before the transfer completes, Globus will notify you to re-authenticate on the collection, after which Globus will continue the transfer from where it was paused.
These wide-ranging capabilities make data transfer with Globus truly "fire-and-forget."
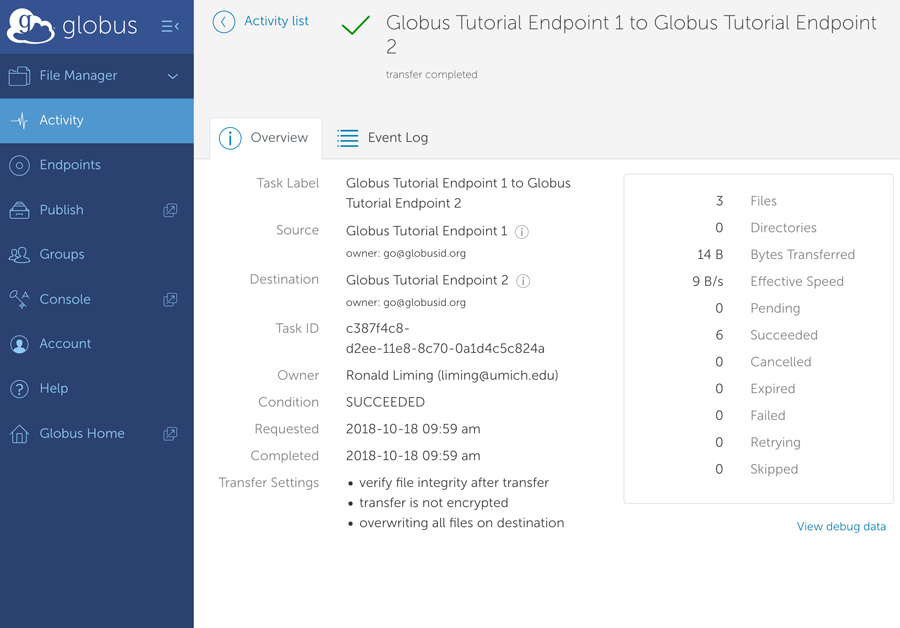
5. Confirm transfer completion
Click Activity in the command menu on the left of the page to go to the Activity page. On the Activity page, click the arrow icon on the right to view details about the transfer. You will also receive an email with the transfer details.

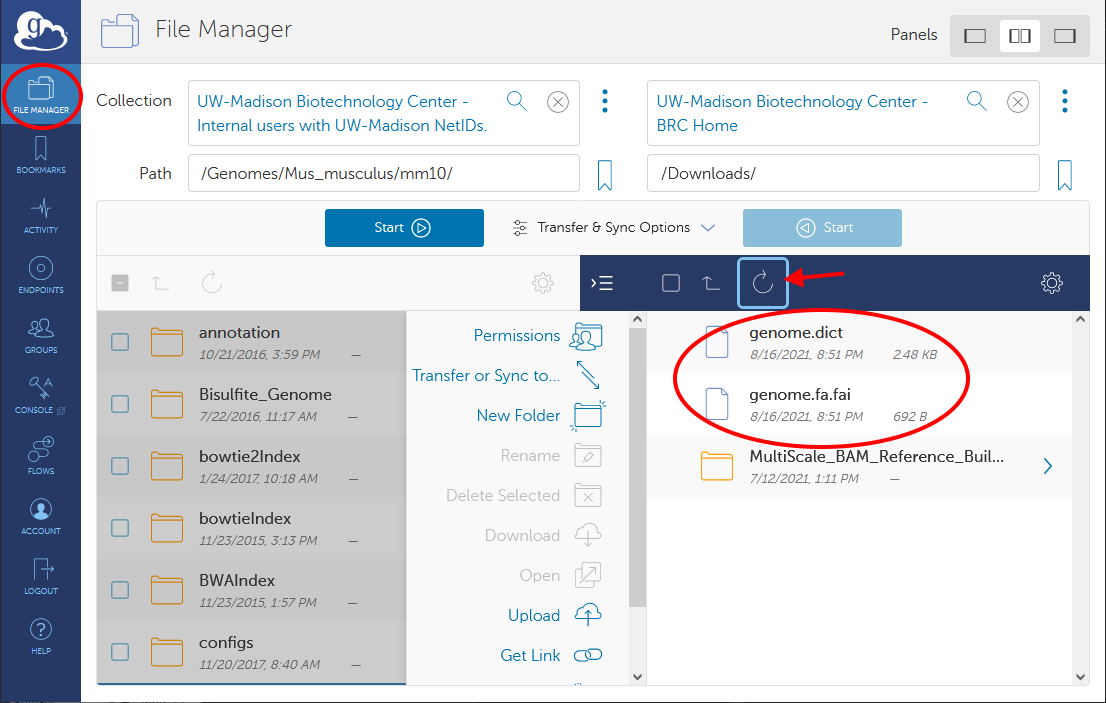
Click File Manager in the command menu on the left of the Activity page to return to the File Manager. The collections you were viewing before will reappear. You may notice that the transferred files are not listed in the right panel with the "receiving" endpoint collection, even though the transfer has completed. Click the refresh icon (circular arrows) at the top of the collection panel to see the updated contents.
6. Uploading Files to UWBC
NOTE: Uploads
For security reasons, data uploads to UWBC servers is not enabled by default for globus users.
You must first request permission to upload data to our servers. Additionally, you can only upload data to your account subfolder under the /Upload/... direcory.
You can transfer files to the selected "UW-Madison Biotechnology Center..." endpoint in the same way that you access a collection for download. You do not need to install any software to upload files from your local computer to our Globus endpoint.
Select the "UW-Madison Biotechnology Center..." endpoint from the File Manager page as described above. Set the path to:
/{account_name}/UPLOADS/{facility}/
Click "Upload" from the command panel. You may get a message that asks you to approve permissions for file transfer.
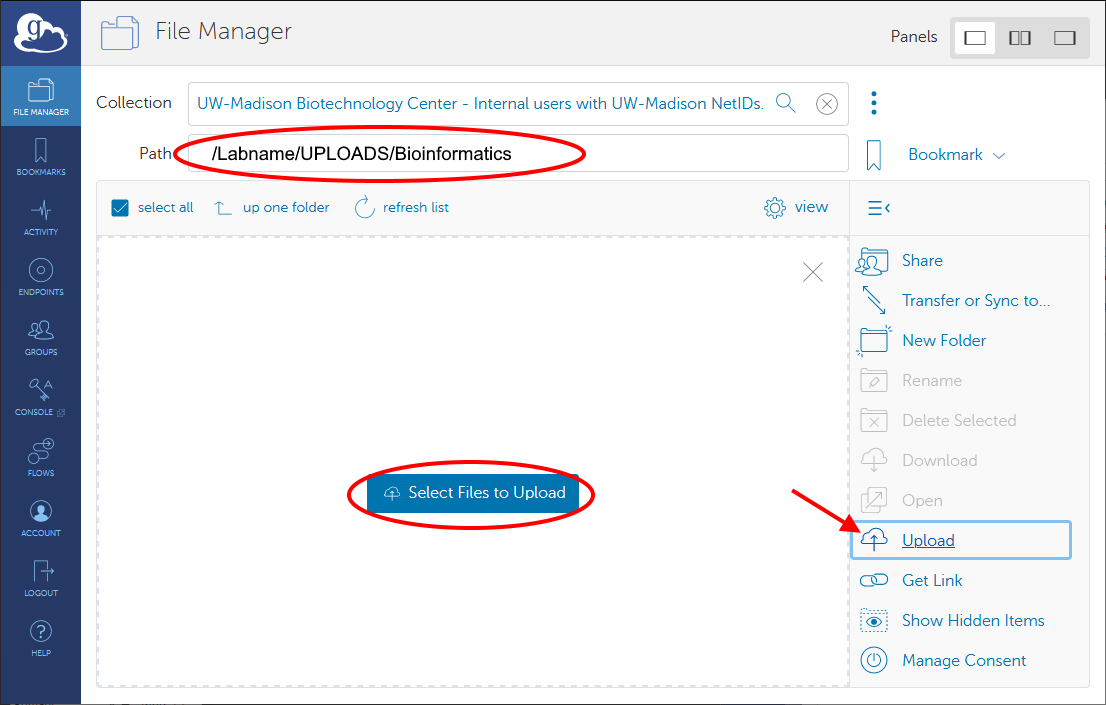
Click the "Select Files to Upload" button. Your computer's local file explorer window will open and allow you to select the files to upload.
You may need to click the "refresh list" button at the top of the directory viewing panel to see the uploaded files on the UWBC endpoint.
7. Creating Endpoints
Make sure to explore globus.org to get a full description of how to configure and use Globus.
Tip: Endpoints
An endpoint is a server or workstation that hosts collections. If you want to be able to access, share, transfer, or manage data using Globus, the first step is to create an endpoint on the system where the data is (or will be) stored.
Globus Connect is used to create endpoints. An endpoint can be a laptop, a personal desktop system, a laboratory server, a campus data storage service, a cloud service, or an HPC cluster. As explained below, it’s easy to set up your own Globus endpoint on a laptop or other personal system using Globus Connect Personal. Administrators of shared services (like campus storage servers) can set up multi-user endpoints using Globus Connect Server. You can use endpoints set up by others as long as you’re authorized by the endpoint administrator or by a collection manager.
Set up and use Globus Connect Personal.
You don't need administrative privileges on your system to install Globus Connect Personal.
Watch the video: Install timestamp
- Follow these instructions to download Globus Connect Personal and set up an endpoint on your own Mac, Linux, or Windows system.
During the install, remember that you are naming an endpoint (or computer) not a collection. You set your collection folders later. - Once Globus Connect is installed, you need to make a collection on your computer.
- Navigate to the File Manager page and request a transfer between your new collection and another Globus endpoint.
- Navigate to the Activity page and review your transfers.

View a video tutorial for Globus Personal Endpoints here.
FAQ
Do I have to install the Globus applicaiton?
Only if you want to download multiple files at once. A single file can be downloaded via your web browser, but folders and multiple files require you to use the transfer button to move the data between endpoints (Installing the Globus application creates a personal endpoint on your local machine).
What is the difference between "Download" and "Transfer"?
Download will use a web browser to "Download" a file to your local machine. Globus is designed for large data "transfer", it establishes a secure connection between two computer systems, which Globus calls "Endpoints". A "Transfer" happens in the background so that your browser can be closed without losing your progress. Transfers can also be scheduled.
(Watch the video: Transfer timestamp)
What happens to my personal endpoint when I turn off my computer or I lose internet?
Transfers to and from your system won't fail if you shut your system down or disconnect from the network. Instead, transfers will be suspended and they'll automatically resume when your system comes back online.
Globus, on your behalf, continues to retry the transfer when a
problem is encountered. The problem could be permissions (as is the case
in this exercise), the endpoint might become unavailable (perhaps you
closed your laptop while copying data to it), or any number of other
issues preventing the transfer from progressing. Globus will continue to
retry the transfer until (1) the problem is fixed (permissions changed,
resource becomes available), (2) you cancel the transfer task (click Cancel Task
on the Overview tab), or (3) no progress has been made in three days,
at which point Globus will notify you the transfer has failed.
Does Globus work with Linux?
Yes. Globus is designed to transfer data between two data center endpoints. If you don't have a server license for Globus, then you can install Globus connect personal for Linux.
Does Globus support command line?
Yes. Globus does have support for a command line interface (CLI). However, this goes beyond the scope of this tutorial. See the documentation provied by Globus, here.
Can I use Globus to tranfer data if my organization is not listed?
Yes. If your organization's email is powered by Google, then you are already set and you can use your email as your Globus Identity. Globus also supports ORCiD authentication if you have an ORCiD account. If all else fails, you can create a Globus ID directly through Globus. Don't worry, if your organization decides to support Globus in the future, you can link this Globus login method to your organization later by following the steps above.
A Globus Identity will usually be formatted like an email address (username@globusid.org).
If logging in with a company email hosted by google your Globus Identity may look like this: user@comapny.com@accounts.google.com
What if I want to change how I log in?
Globus can link multiple idenities to the same account. This means that you can sign in to any supported login and still see the data shared with your PRIMARY Globus account. Instructions for out to link a new identity to your Globus account can be found
here.
What if I can't read?
We created a tutoral video that can viewed here.